

Snap peas are incredibly versatile. They make great snacks raw, and you can basically throw them into any salad or sandwich no problem, and they get sautéed and added to a lot of stir fries. Just when you thought you had your snap pea game down, you realize that I, and Portlandia, might have another idea:
In this post, I will go over two different methods of pickling, one the lacto-fermented kind (despite the name, its definitely vegan, it is merely referring to the lactobacillus bacteria that is involved in all open air fermentation) and the other using vinegar. The vinegar method is faster, but not as beneficial for your gut flora as the fermented kind, however the combination is ideal because the apple cider vinegar serves as a prebiotic while the fermented produces probiotics, and in both cases your radishes, turnips, sweet peas, and another other veggies laying around can live long past their peak time.
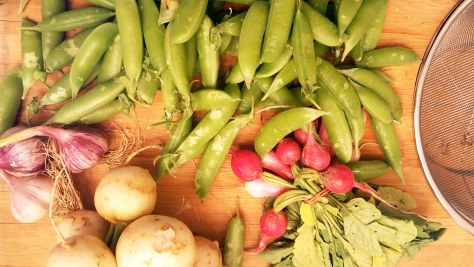
Snap Peas- about 1 lb, strings removed, split between two quart sized mason jars
Radishes- one bunch, halved, as seen above, split between the two jars
Turnips- 4-6, sliced or chopped, split between the two
Garlic, sliced, 1 bulb split between the two
Vinegar method:
Apple cider vinegar, 1 cup and 1 more to fill
Water, 1 cup
1Tbs sugar
1 Tbs salt
1 tsp black peppercorns, whole
1 tsp coriander seeds, whole
1 tsp mustard seeds, whole
1 tsp fennel seeds, whole
Fermented Method:
Water, 3 cups
1.5 Tbs Salt
1 tsp black peppercorns, whole
1 tsp coriander seeds, whole
1 tsp mustard seeds, whole
1 tsp caraway seeds, whole
( and in ~2 weeks, fresh dill, oregano, basil, rosemary, or any other fresh herb)
For the Vinegar method, Combine 1 cup vinegar and sugar in a saucepan over medium heat until sugar is dissolved. Remove from heat, add the water and let cool.
Fill each jar about 1/2 way with peas, and the rest of the way with garlic, radishes, and turnips. For the vinegar method, turnips are best sliced into discs, and for the fermented nice chunks work best. Radishes for both, I just split into halves, the long way, when possible. The garlic is great in thick discs, but a chunky chop is also good.

Now that your jars are about 3/4 full with veg, separate your jars with labels and a date. Pour the vinegar mixture over the veggies and pour in more uncooked vinegar until covered– not to the top (usually about a cup if using quart sized mason jars) and then add the salt and spice, and shake well to combine.
For the fermented, mix the salt, spices and water together in a bowl to combine and then pour over the veggies, adding additional water if necessary to cover, no where near the top).
The vinegar pickles can go right in your fridge, and are ready to eat in 3-6 days. Or, if you want them faster, leave them covered at room temperature for the first day, and then place them in the fridge to be ready immediately.

The fermented jar needs a bit more tending. take a smaller jar, or a weight, and keep the veggies below the surface of the brine, in an uncovered jar. You want the liquid to have air exposure, but not the veggies, in other words. Its hard to see, but the jar inside the jar is forcing the liquid in the larger jar to come all the way up to the very top of the large jar. For this reason, I store mine in a bowl, and cover the entire thing with a dish cloth.
Now, set it aside, away from heat or light, for about two weeks, you can check on the acidity level for taste as you go, and when it’s just about ready, plop your fresh herbs in, screw on the lid and put them in your fridge to be eaten at your own pace!
Enjoy!

